As a teenager, I never considered fine tuning my compound bow for hunting season. Most of us farm boys didn’t even know about tuning a bow. If I was able to hit the target, center mass at 30 yards, from a treestand, I was A-OK and ready to hunt. I now see how much I missed and how I can now improve my set-up for not only treestand hunting, but also hunting on the ground in preparation for longer range shots. One of those key factors is paper tuning and it’s rather easy to achieve the results you are looking for, taking into consideration that you may still need to visit a pro shop for final adjustments.
When I first started paper tuning, I would gather up by archery gear, hit the pro shop, and get dialed in properly. After talking with them and understanding what was going on, I figured I could do it at home. The great thing is, anyone can build an inexpensive paper tuning set up at home, it just takes an open mind.
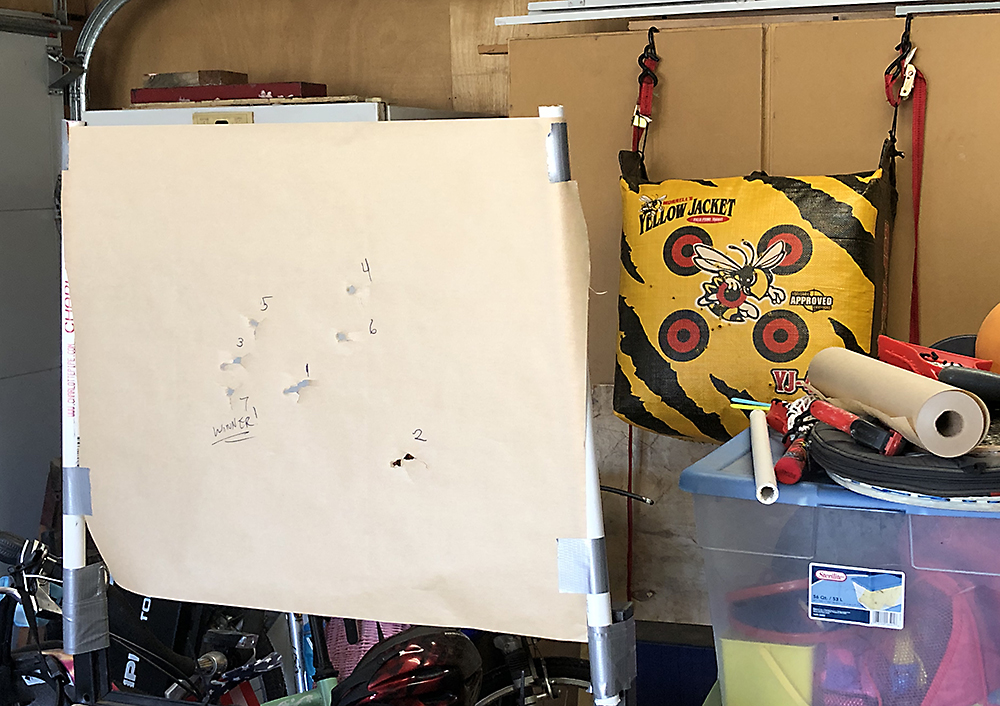
Key items you will need are a frame of some sort, paper, tape or clamp, marker and a bag target for the backstop. Some people build awesome frames out of PVC, but I don’t have a great deal of room, so I utilized a rifle target frame I already had. After buying a roll or brown masking paper and a six foot section of 1″ PVC tube from the hardware store, I started in on crafting. I simply cut the PVC into two foot sections and duct taped two of them to the existing frame. I cut a piece of the paper that would fit across the width of the frame and secured it with more duct tape. I love duct tape, don’t you? If you don’t want t use duct tape and have a couple clamps, you can use those, too. Like I said, I didn’t have the room to build a frame in full. If I had that space, I would have built it to allow me to roll the paper down and secure it. That would make it much easier.

Setting your target behind the frame should be carefully considered. You want to be sure that your paper is directly in front of the target by at least twice the arrow length, three times it if you can find the space. This allows the flight of the arrow to be true. I set mine up on a couple ratchet straps attached to our built-in shelving. It’s not glamorous, but it gets the job done. Once you are happy with placement you can begin to paper tune.
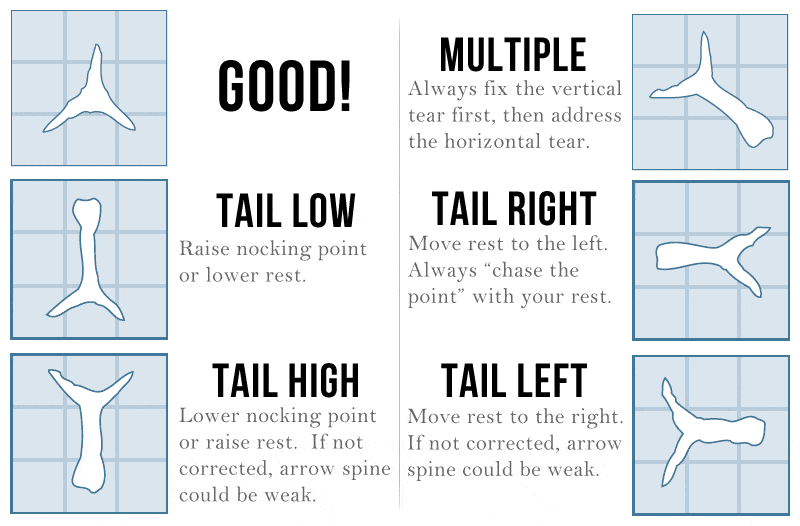
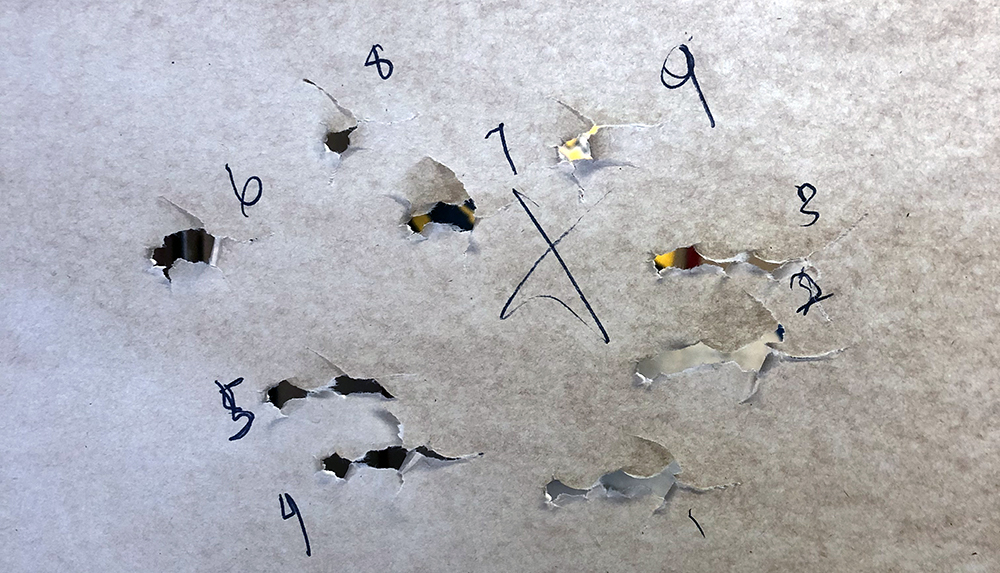
I usually stand two yards away from the paper when I begin to tune. I shoot an arrow, see which way it tears the paper and make the proper adjustment to my rest. Be sure to mark the number of the shot on the paper so there is no confusion later on. Sometimes your bow will tune in three shots and sometimes it may take nine or ten. It all depends on your bow and you. Sometimes you will be shooting a bullet hole (desired) and your arrow will be perfectly straight (or very close) on the rest, which was my case recently. After the bullet hole at two yards, I then step out to 6-10 yards and shoot again, always looking for the same result. A consistent bullet hole is the desired result.


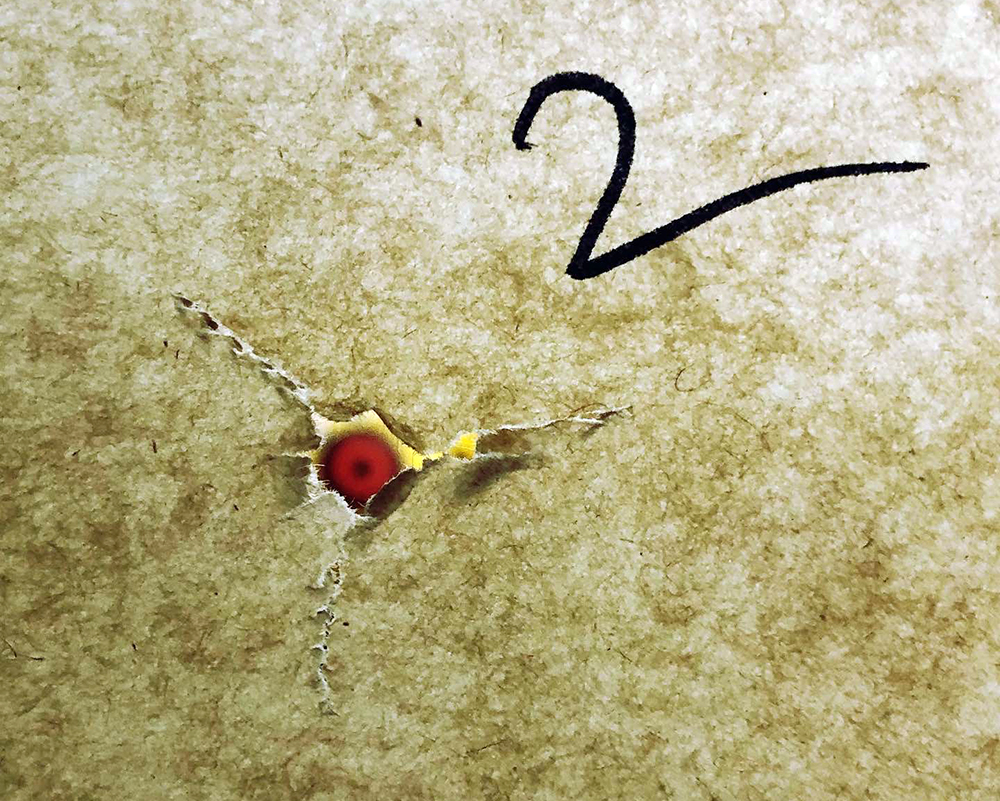
When I helped my friend Ramon tune his bow, we had more dramatic results. While his arrow drove through the paper and created a perfect bullet hole (see image below), his arrow cocked so far to the left that I knew he would need to visit a pro shop for minor adjustment that I was not capable of doing in my garage.

As I mentioned earlier, you can do this at home to save you time and money, but you may end up needing to visit a professional archery shop to perfect everything. I highly recommend paper tuning and shooting your bow with someone watching you to verify proper form and release. We can all use improvement and with practice and guidance, we can be better archers and bowhunters. Every time I shoot my bow, I want to be a better archer than the last time I shot. Setting goals like this can help you mentally and help you figure out where some adjustment may be needed. If you have questions about setting up your own tuning station, please email me or message me on social media. Take your time, get it right, and I look forward to seeing your own set-ups and results.
Be First to Comment