My 2021 Compound Bow Build – DIY Paint and Accessories
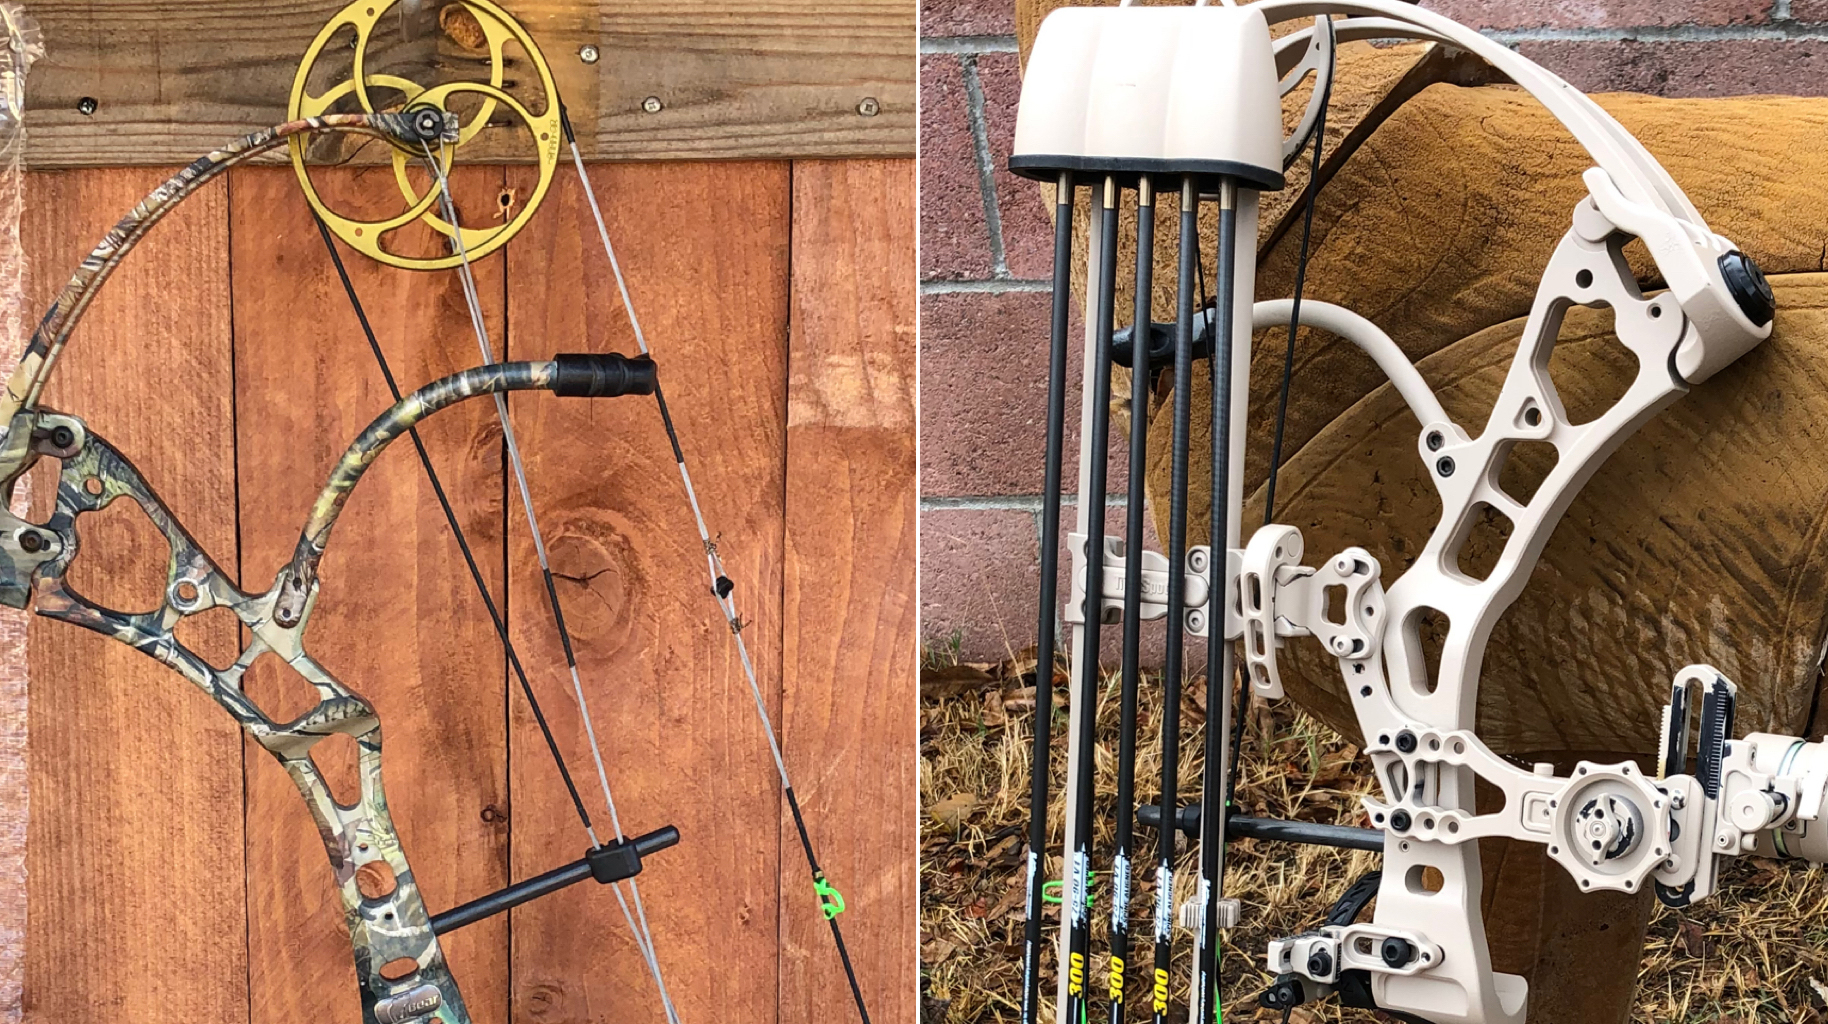
Over the course of the last couple months, I have been working on cleaning up and getting an older, but new-to-me bow set up to hunt. I purchased a used 2011 Bear Attack compound bow from a buddy who was offloading it from his shop. In full disclosure, the first things he told me were that the limbs had peeling paint (like a lot) and that they would need some work. Other than that, the bow was ready to shoot. Back in 2013, I owned a Bear Attack and loved it. Stupid me decided to sell it because I was getting another bow. I’ve thought about that bow for a long time, so when this one blipped on my radar I had to buy it. I decided I would set this bow up to hunt out of a treestand. I love hunting out west, but sometimes my set-up gets a bit bulky in the treestand areas I hunt. This bow would fit the bill nicely.
I’ve shared with some people that I was going to write up a lengthy post on what I did with the bow to prepare it, paint it, and what accessories I added to it. Instead of that, I decided to produce a photo essay of sorts. This post will be photo heavy, and I will share what I did in the captions. If I miss anything or you have any questions, let me know.
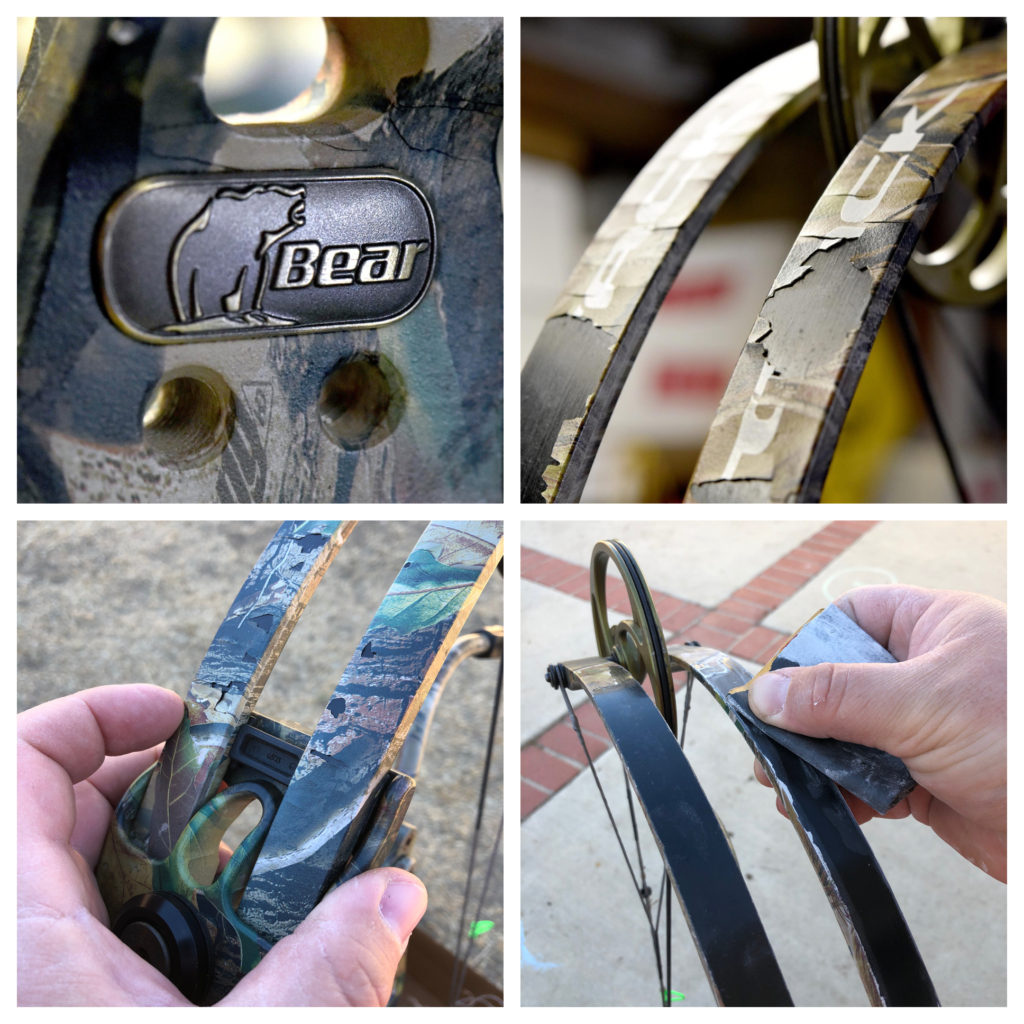
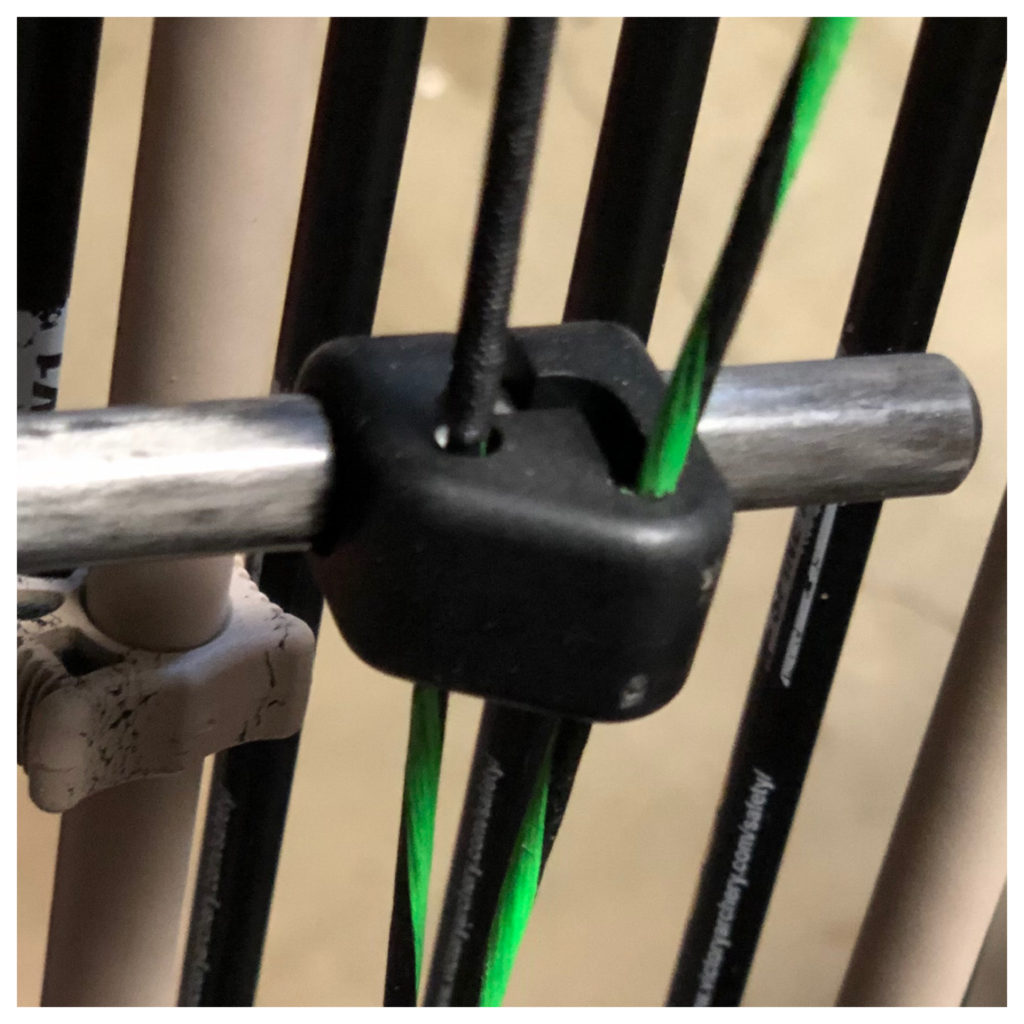
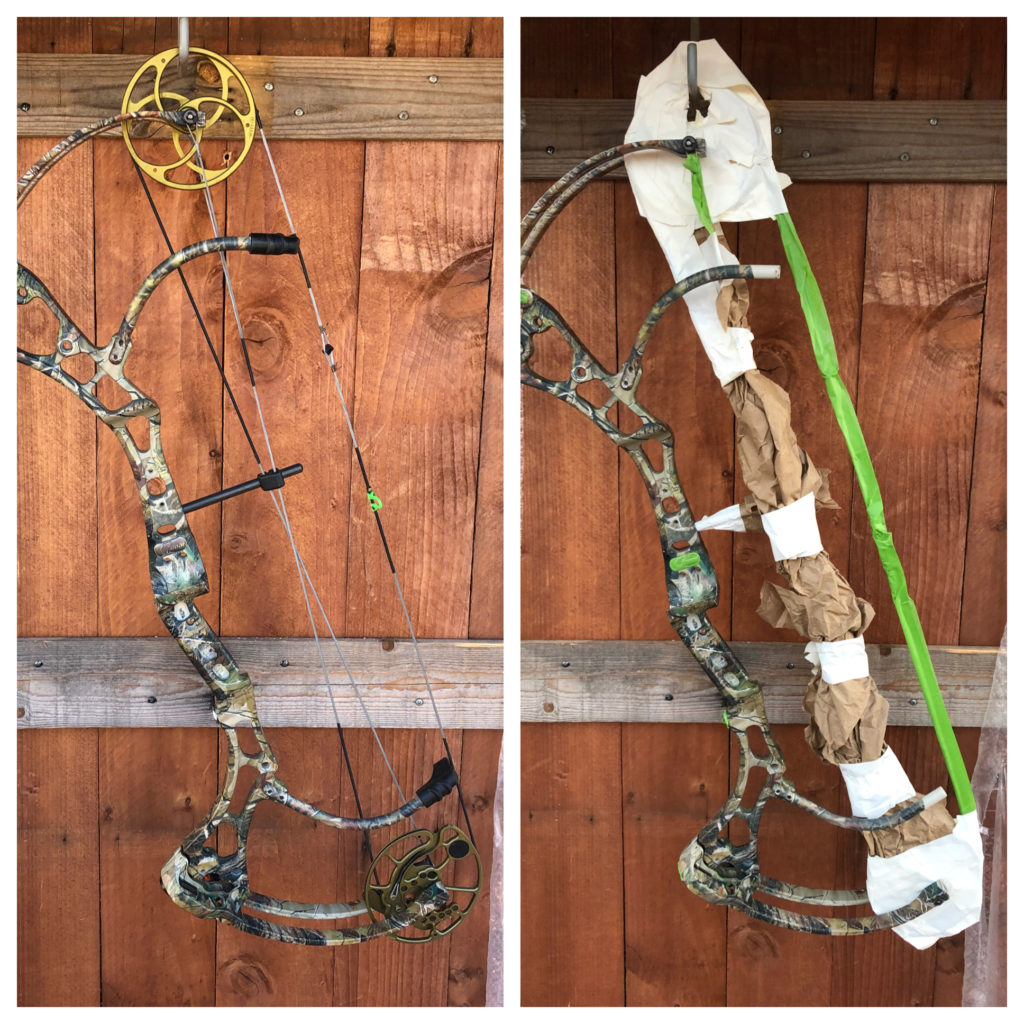
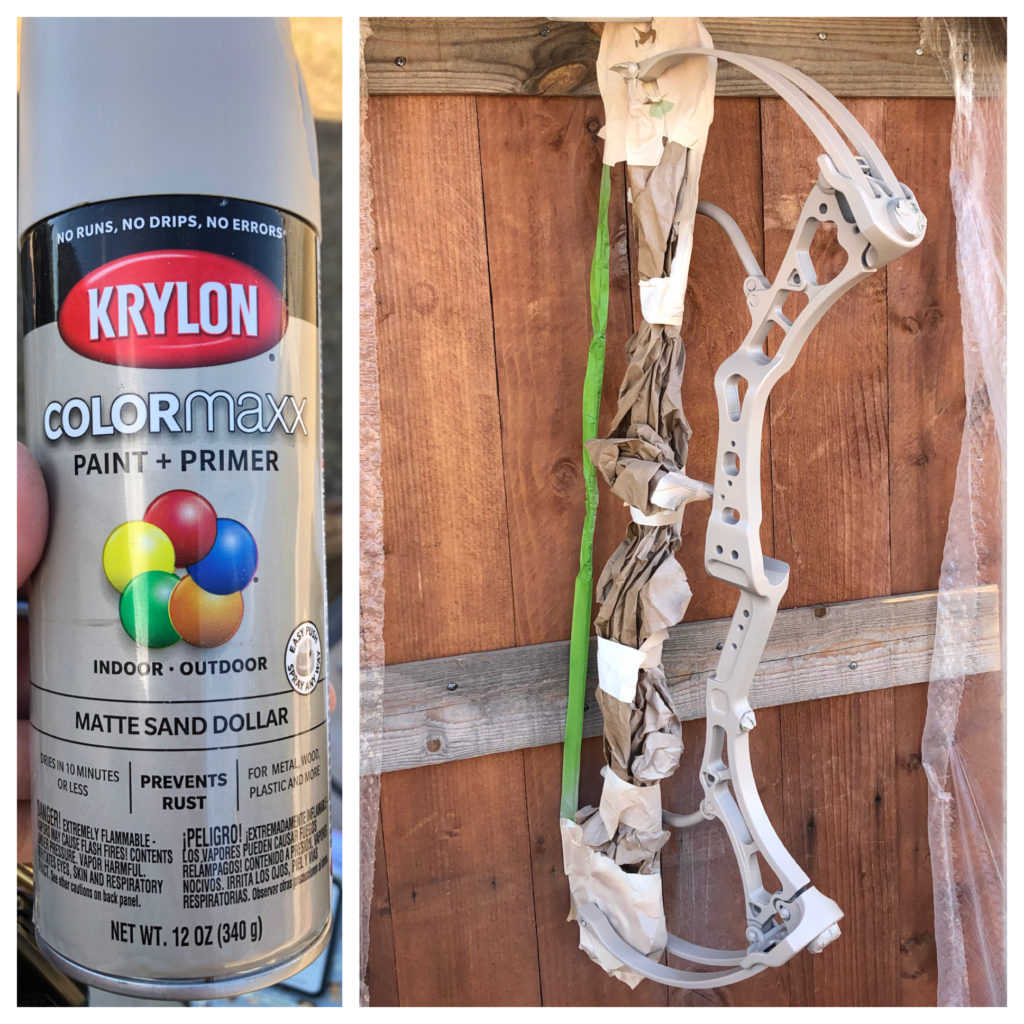
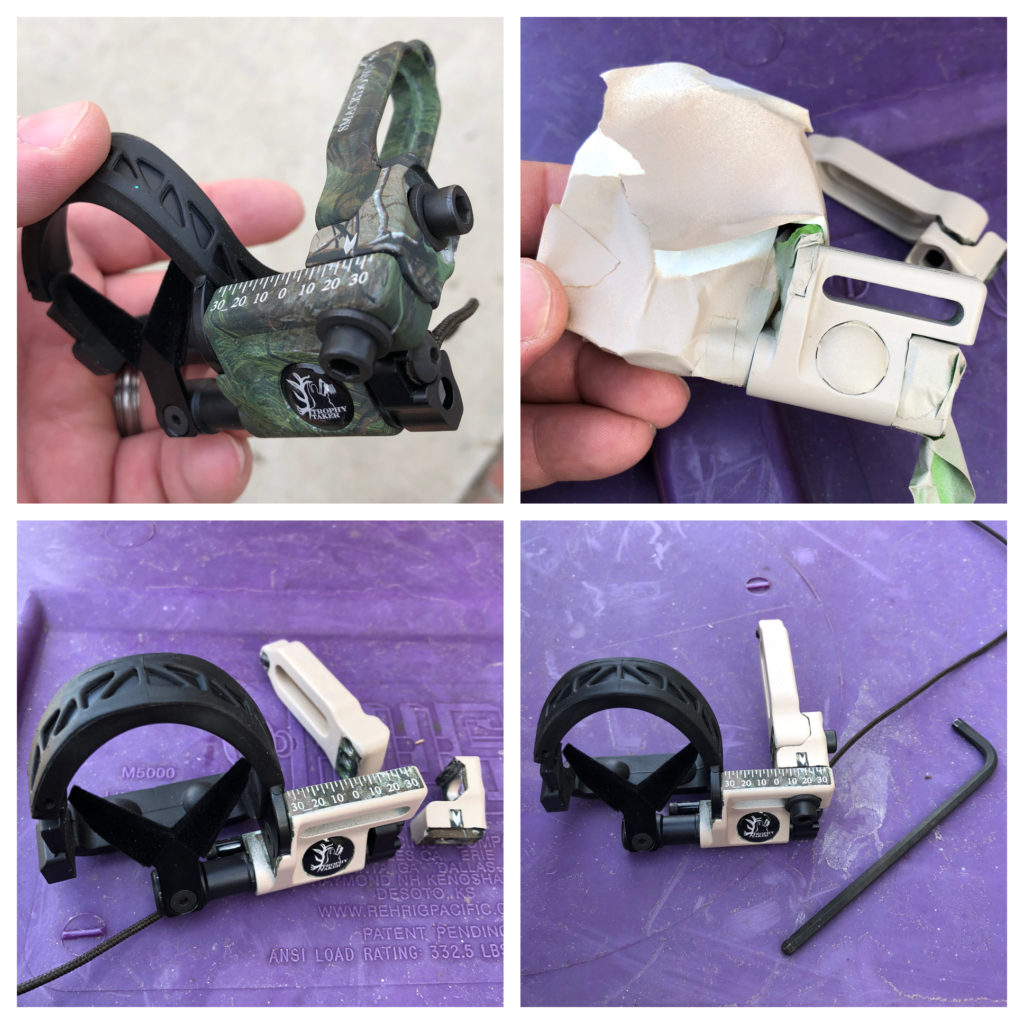
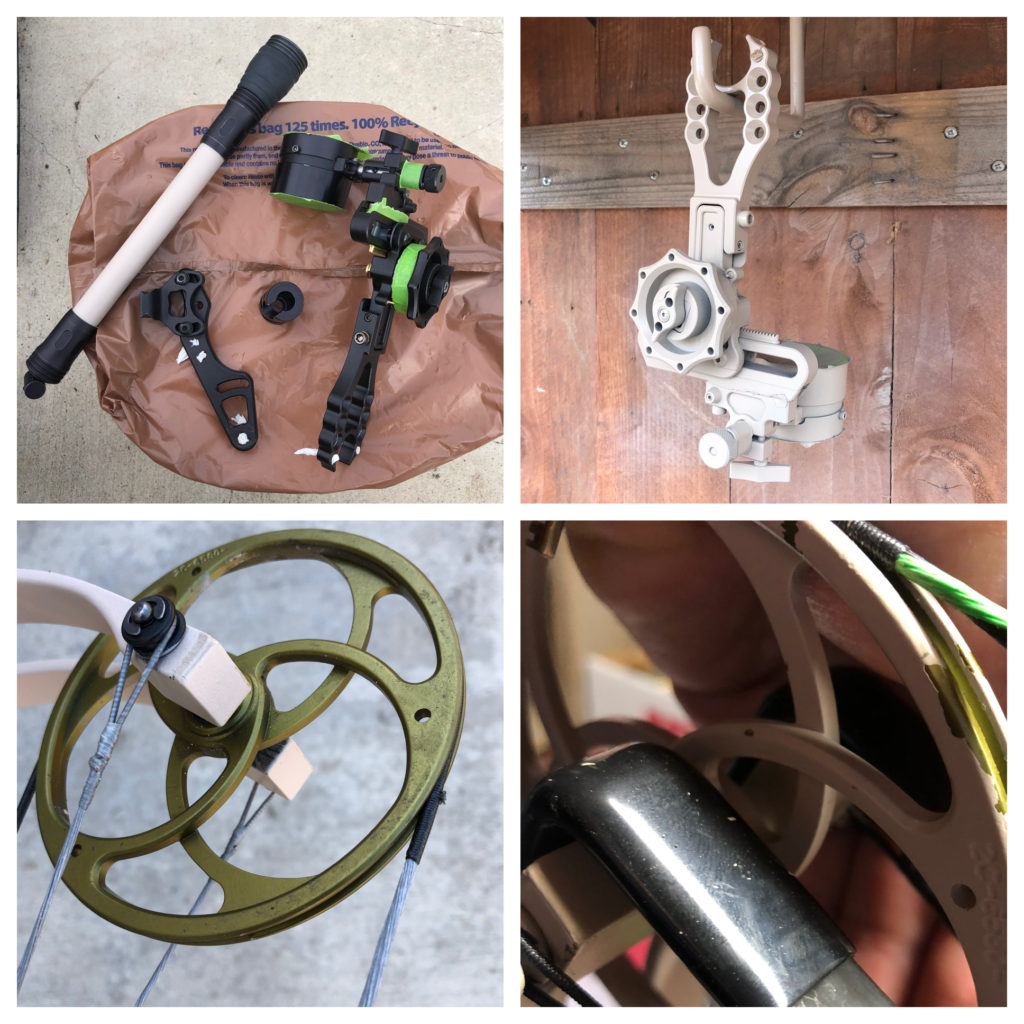
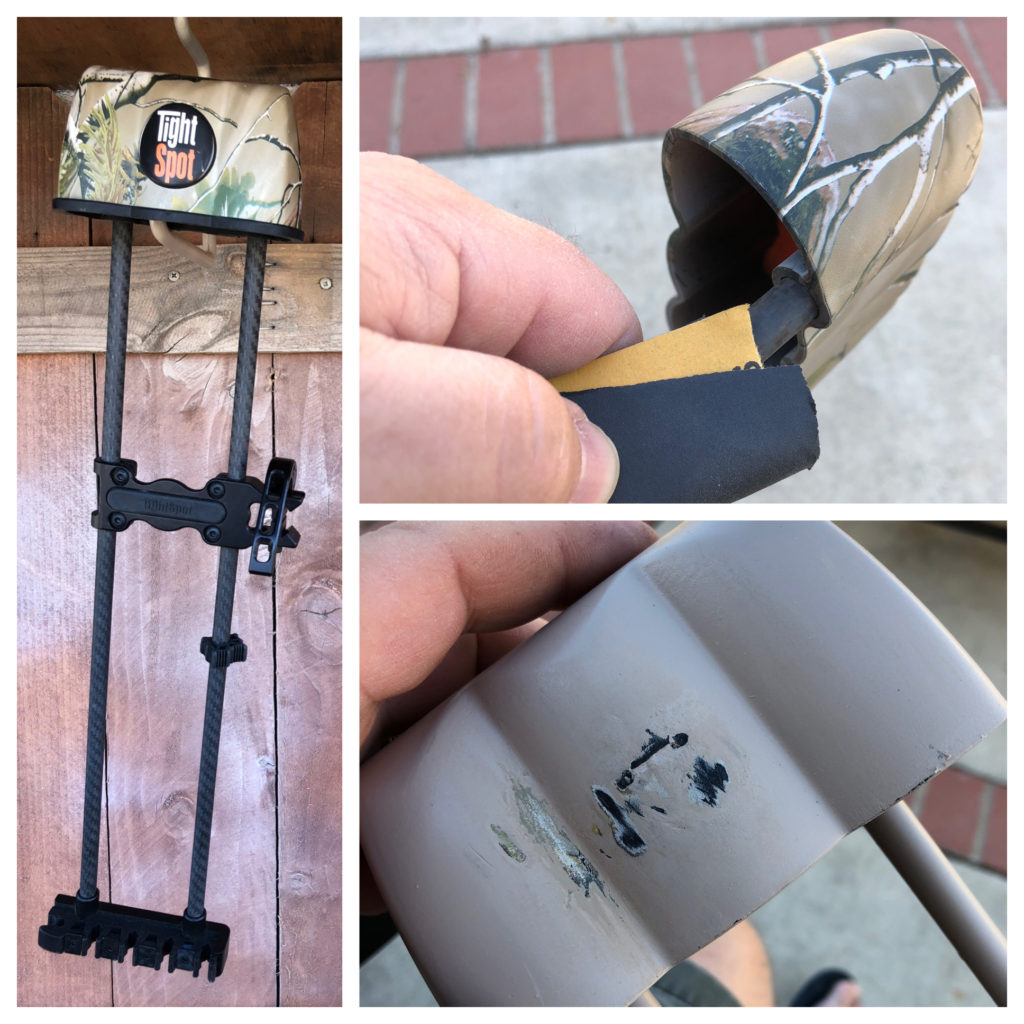
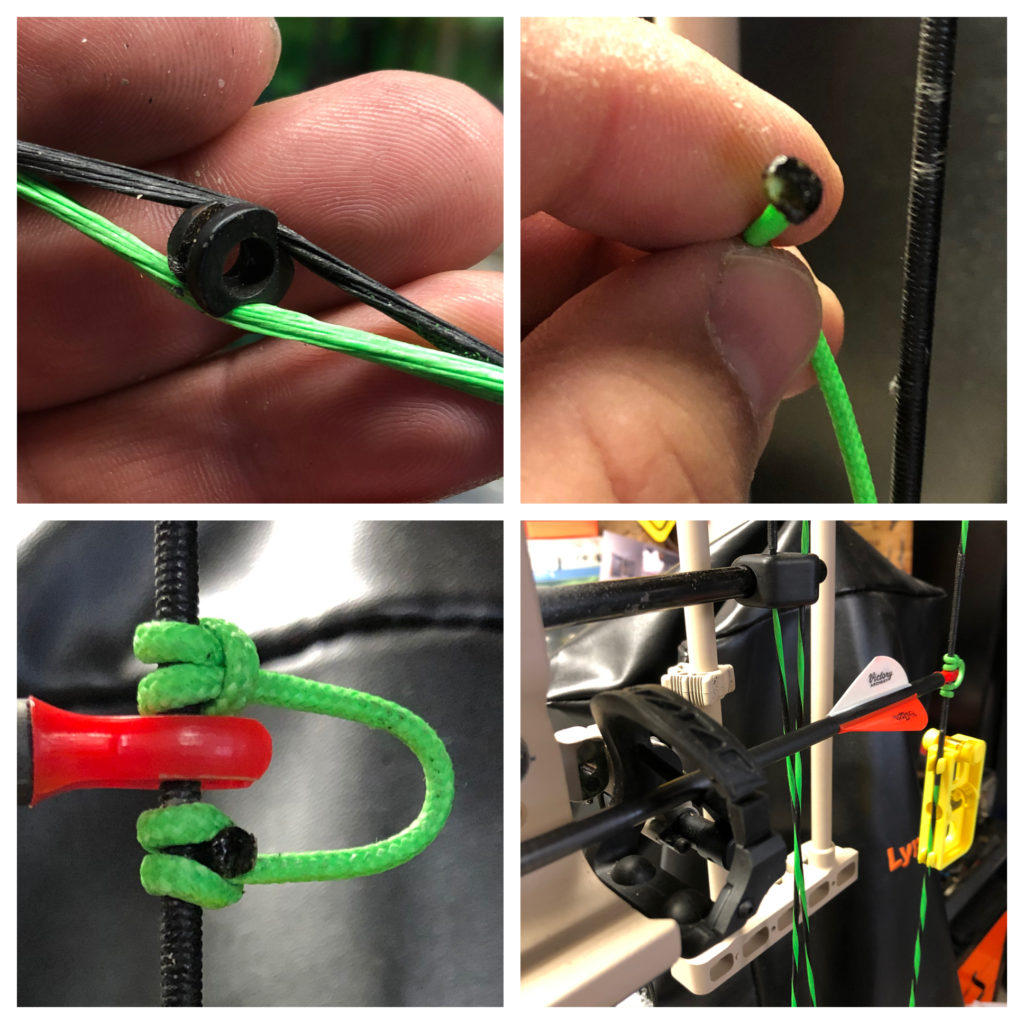
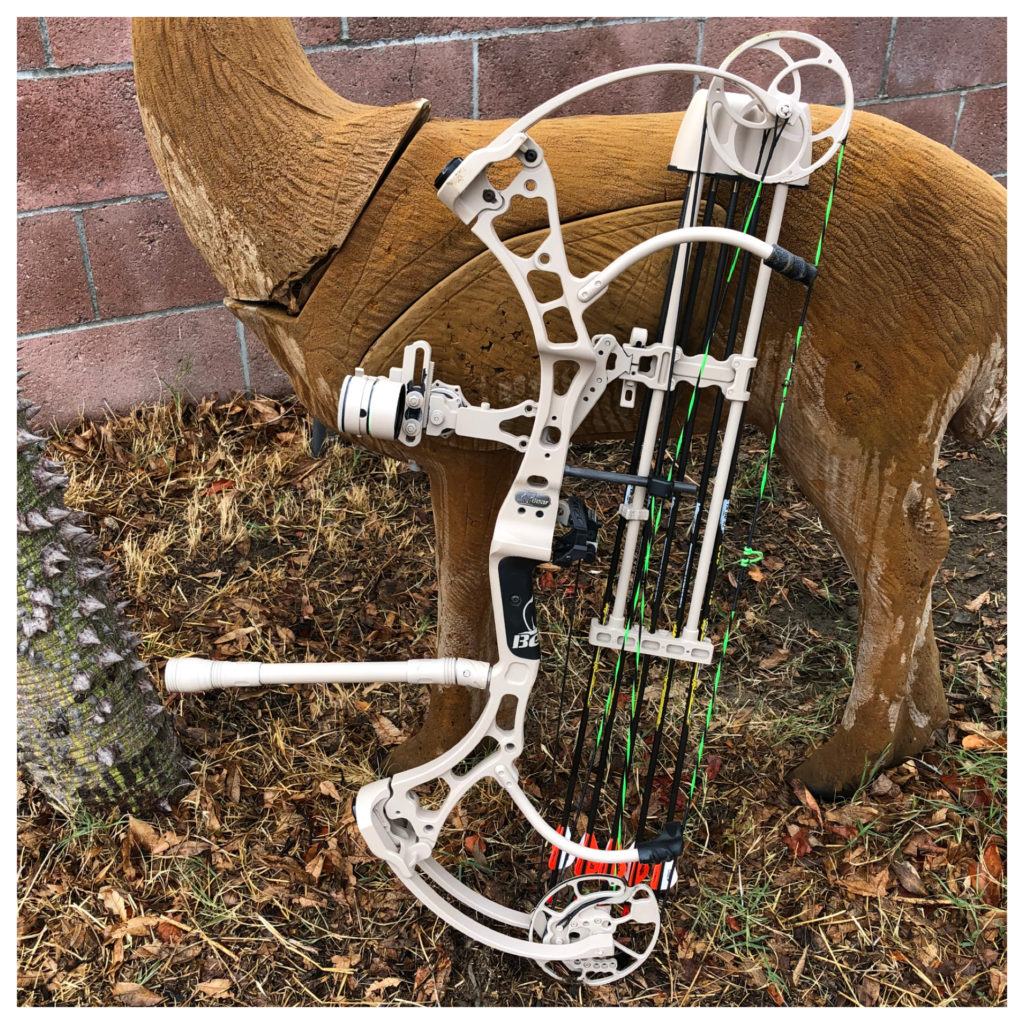
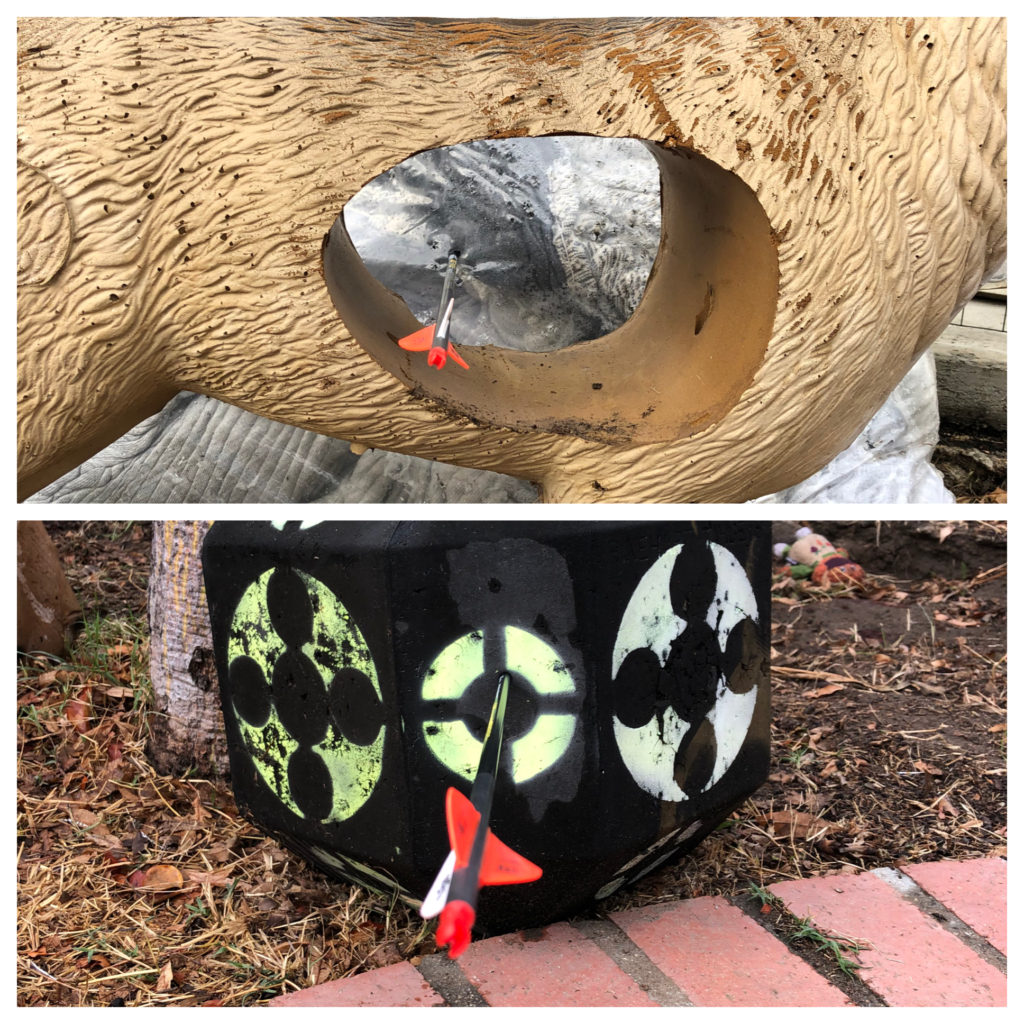
L to R, Top to Bottom: Bear Archery logo (just looks cool), peeling paint, flicking paint chips with my fingernail (I used a sharp blade after), and then using wet sandpaper to take off the smaller bits and level it out.Replacing the cable guard was a no-brainer. The original was white and it stuck out like a sore thumb.Before and After: The tape up. I used a combination of Frog Tape (for the strings), paper stuffing over the cables with white photo tape for the cams. Use whatever works for you, but the Frog Tape peels off really easy and is great for taping up a bow.I wanted to try using an inexpensive, matte paint for the bow. I opted for Krylon ColorMaxx Matte Sand Dollar at $3.98 a can. I needed two cans because I played around with coverage. Most people would get by with one can. I also applied a single coat of Krylon COLORmaxx Flat Crystal Clear Spray Paint (also $3.98/can) as my final application to dull any sheen.To paint my Trophy Taker Smackdown Pro rest, I took it apart and then taped it up with green Frog Tape.At first, I thought I wanted more original color to show, but after trying it out, I decided to paint everything, even the cams. You can see it is chipping on the cams, but I’m indifferent as it covers most of it and is liable to chip anyway in the field.The TightSpot Quiver needed a bath in paint. to match. I peeled off the decal, pulled the staple from inside that held the inside protective layer, and then removed the rubber protective layer. I glued the staple holes and painted them. Unfortunately, the glue hadn’t cured properly and left streaks. It took some work, but I remedied the issue.New Piranha Bowstrings were added using a portable Bowmaster bowpress. I also purchased the bracketed arms for use on a wide limb bow. It was my first time attempting this and it turned out great. I did have to spend some time with a bristle brush and alcohol to clean out the cam groove. Ten years of wax build up was tempting the string to jump off the cam.Peep sight, D-loop, and arrow rest installation was next. I will have to go back and give the string a half twist to align the peep and D-loop after I put about fifty shots through the bow.Finished result from the right side.Finished result from the left side.After a couple shots and a slight sight adjustment, I was shooting well, but if you look close my arrows are coming in at a L-to-R angle. That means it is time to paper tune and make minor adjustments to shoot that bullet hole we dream of.
As you can see, the DIY compound bow paint project was a success. Time will tell with how long the matte paint will hold up, but for all intents and purposes, it should be fine for my needs. I will take some time to paper tune and see if I really need the 11″ stabilizer up front. For hunting out of a treestand I may not need it at all, but for now it stays. I will follow up on my progress over the next couple months. I like to tinker and there is so much I can do with this Bear Attack to get it shooting just right. Until then, let me know if you have any questions and what you might like to see next.
Al Quackenbush has hunted and fished for the better part of 40 years. He shares his knowledge to better the sport of archery, hunting and to help educate others.
2 Comments
Amos said:
This is awesome!
How did the paint hold up on the limbs (and in general)?


This is awesome!
How did the paint hold up on the limbs (and in general)?
Thank you!
Paint held up as well as can be expected. Wasn’t baked on so it needed some touch up.